Did you really expect that I could have a whole month of How Tos, Tuts and Giveaways WITHOUT some Copic tuts? Well, we’re going to have a whole week of fun! I’m happy to have some help in the big undertaking this week by some girls that you might know… Zoe, Amy and Melissa! Copic Queens all 3! I’m looking forward to what they have to share!
Today its my turn though and I have a little share about the Copic ABS, AirBrush System.
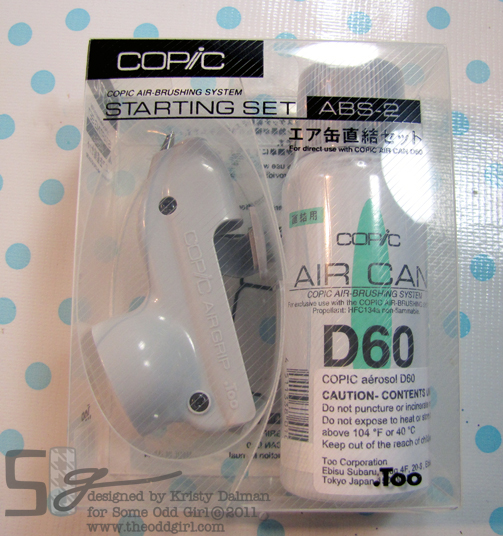
I finally got my hands on the ABS-2 set! I had used it at my Copic Certification class but never had one at home. The instructions on the box aren’t fabulous but the paper inside has a nice picture but there are a couple points that pictures may help 🙂
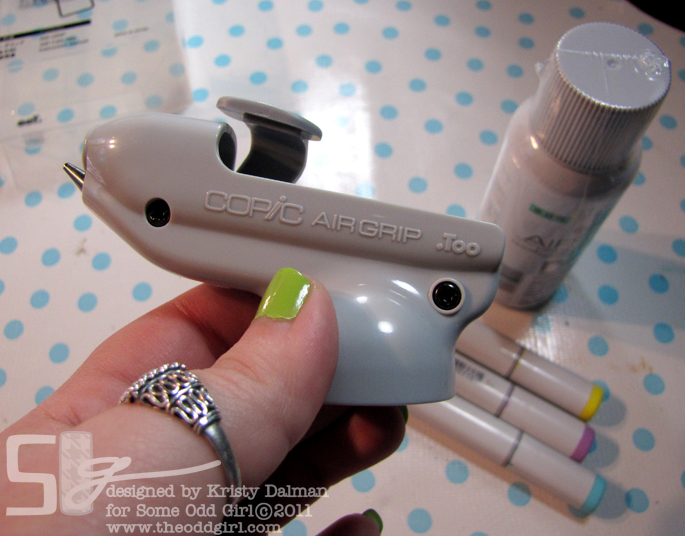
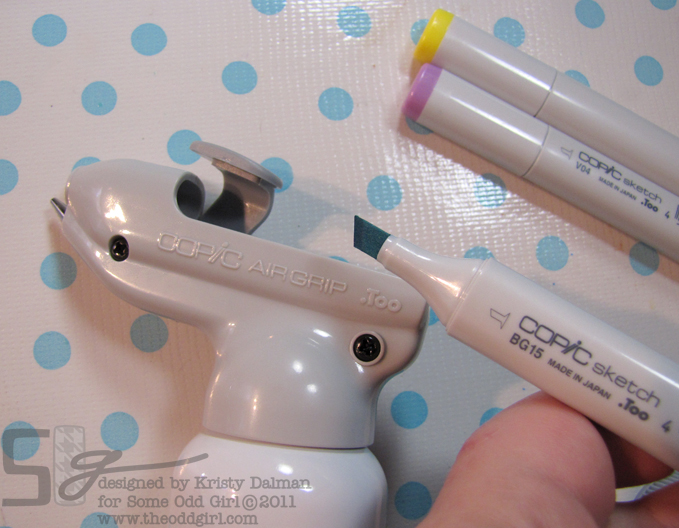
The ABS-2 comes with the Copic Airgrip and a small can of compressed air. I’m saying small because it has about 7-8 minutes of air in there, it may not sound like alot but it can get you far! Also, if you’re not sure if you’ll enjoy airbrushing its a great place to start because you can by bigger cans or go up to an actual compressor using the airgrip included (plus some bits sold separately of course).
Getting set up to airbrush away is really simple with this set too. Well they all are but this one is akin to plug and play 🙂
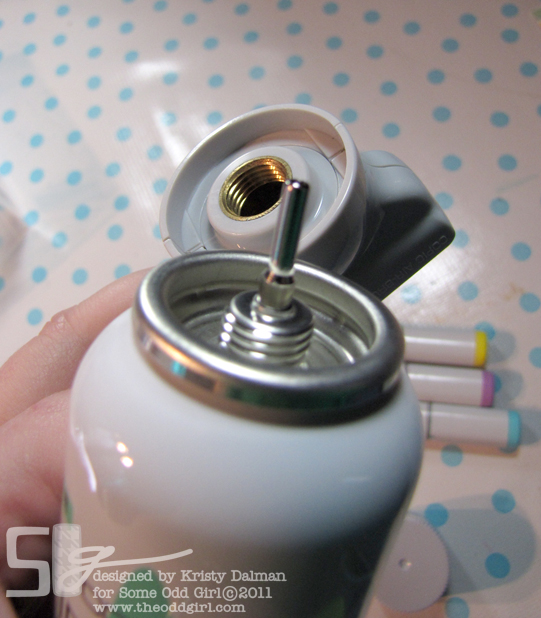
Once you get your goodies out of the box and do a little giddy dance (I did… just assuming you will too :mrgreen:) You’ll take the air grip and the upwrapped, unlidded can or air.
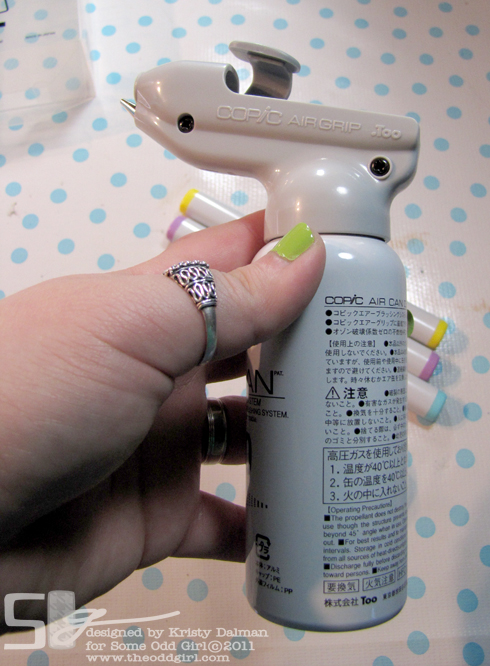
The two are made to go together so screw it on but not SUPER tight, snug though. Screwing it too tight may cause leaks or damage to the can or airgrip.
Now if you’re anything like me you play a good minute of bang bang cowboy with your new awesome gun to “make sure” the air is coming out. After that its time to pick a marker (original or sketch) and get ready to play!
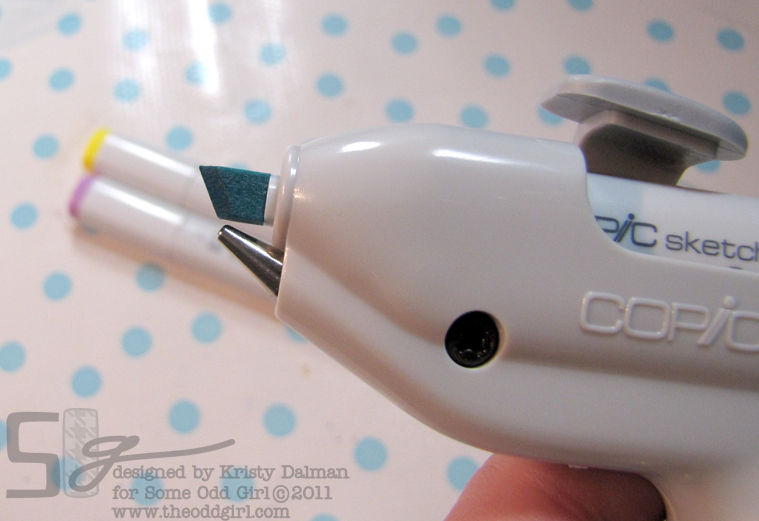
You’ll insert the broad end of your marker into the airgrip with the point up top.
The air will come out of the silver point and blow across the tip. There is a slight room for adjustment with the marker (backwards and forwards) after it “clips” in. Too far back and you won’t get any color and too far forward you’ll get an uneven, speckley spray… which can be good! Depending on what you’re going for 🙂
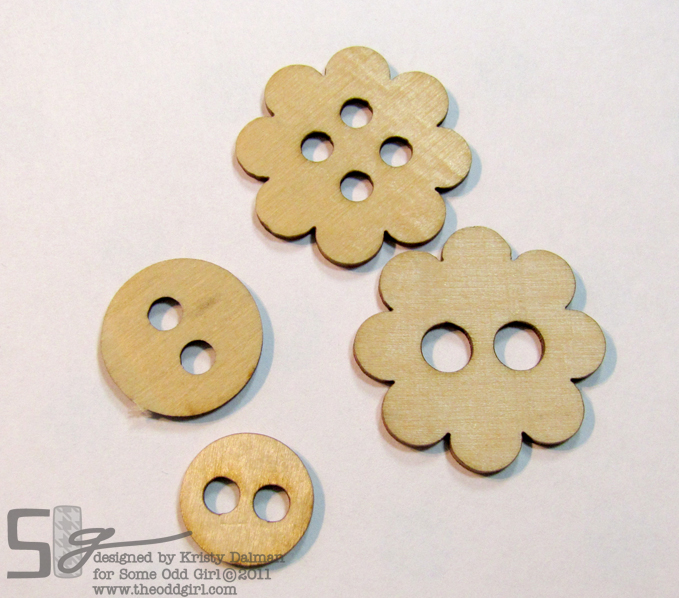
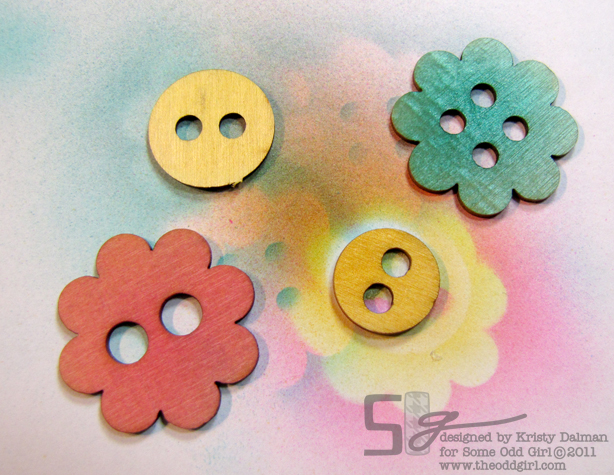
After that you are ready to pick a target or “project” and get your spray on! Airbrushing can use alot of ink if you are really layering it on, just be aware . For this example I’m going to spray these wood veneer buttons from Studio Calico.
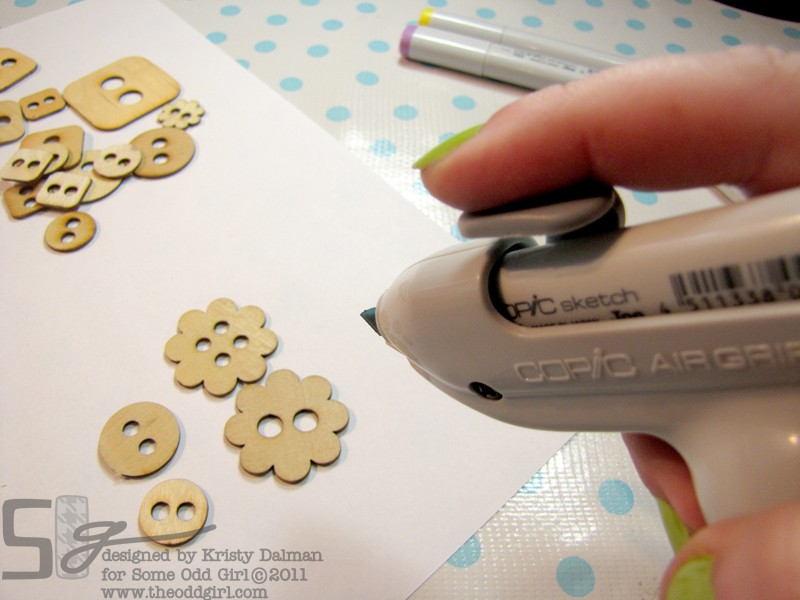
Hold your Airgrip (gun hehe) at about a 45 degree angle. For these little buttons I had to put a dot of adhesive on the back so they didn’t blow away… some good air pressure in that lil can!
I sprayed with BG15, RV04 and Y35. Love how you can still see the woodgrain after they’ve been sprayed! They have a shimmery look to them too. Doesn’t the paper I put down look cool? Masking is another fun to do with the airbrushing! No clumping like some sprays, a bonus 🙂 You can airbrush any of the same things you might color with your copics… paper, glass, buttons, brads, wood, chipboard, transparencies, paper flowers, twine, masking tape, etc etc etc. Really pretty much anything you can think of!
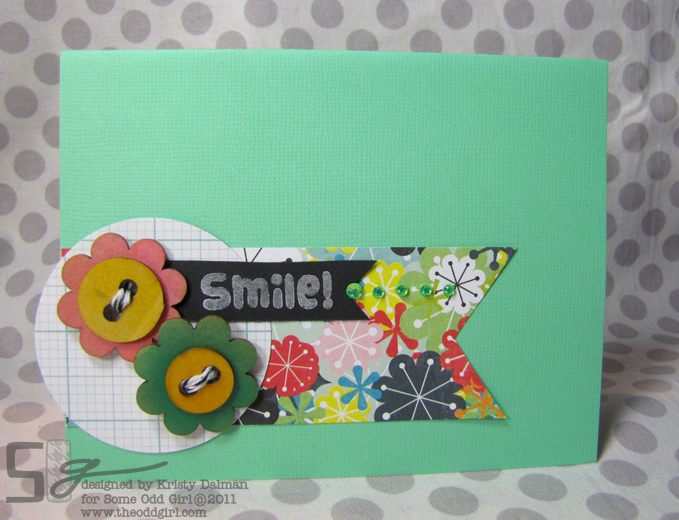
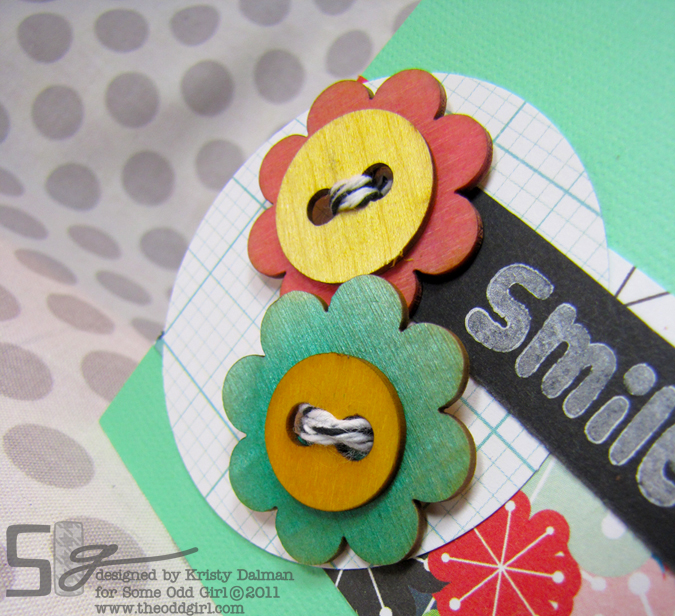
I then just used the buttons on a quicky like project.
Now I have a matching embellie for my card! I would keep the box the system comes in for easy and safe storage too. Unscrew, pop the cap back on the can of air and back in the box.
Being Copic week and all we NEED a giveaway! So I have a Copic ABS-2 to giveaway to a lucky commenter!
To be entered to win you must tell me what you would airbrush with it. Be creative and specific! You can enter all the way thru October 29th and we’ll announce the winner on Oct 31 in our massive candy winners post 🙂 Don’t forget too to link up in the badge linky party up top on the right for a chance to win some random candy! Our first random candy winner was Denise! I’m going to be sending her out a suprise gifty in the mail real soon! You could be next so just grab the badge and link up!
See you back here bright eyed and bushy tailed for some more Copic goodness!





petraso says:
i would do lots of small rainbows om a wall at home!!!
Hmm Maybbe om a Canvas to!! have test airbrusching at artscool years ago!!! and would love to have one!!!
Maria Therese says:
This looks so cool! I’ve wanted this for ages no I see I can use it for even more,
must write it on Santa’s list..
Liann says:
Hmmm i wouLd definiteLy do aLot of shading with it and coLor fLowers and ribbon with it….TFS
Brenda says:
Great tut, you are right the directions are not done well. When I got mine,(I started with this) I used up pretty much all of the air just getting it to work. This is great for anyone just getting started with it!
Leah Crowe says:
goodness what wouldn’t i do with it? I’m thinking tie dyed unders and matching bra sets for starters. This is definitely going on my Santa wish list this year… along with the real markers so I can use it!! Great how to!
auntie em (emily) says:
Great tutorial! The airbrushed look is so amazing when I have seen it done on projects. They look so professional and polished. I LOVE the designs on the paper you had under the wooden buttons. What a fun idea for a background page!
Thanks for sharing! 🙂
Debbie Segler says:
I am very amazed at the copic airbrush. Can it be use with other markers? I have quite a variety on hand! It appeals to my tole painting and canvas painting side of me! I will be visualizing it in my craft studio in my hand, and me wearing my boots and hat shooting at my craft projects!Thanks for the opportunity ! Love ya Deb
Kristy says:
It can be used with the Sketch and Original Copics. I’m not sure if it can be used with other brands of marker but it doesn’t hurt to try! 🙂
Kimberly says:
Wow what a awesome tool!!! Great tutorial too!! Those buttons are so fun on that card!! 🙂 Thanks for this!
Corry says:
HOLY WOW! I just kept waiting for the next picture to see this thing in action! Wowzers too cool! Def on my wishlist now! Thanks for sharing! What would I airbrush…….backgrounds, chipboard……flowers…..! You name it I’d try it! Thanks for the chance Kristy!
Dawnll from Dawn's Craft Place says:
Love my airbrush system- so much fun to play with.
Uta says:
I would colour flowers and chipboards with it. That is a great tool.
Hugs, Uta
Karen says:
I would use this for everything i could think of…right now I am envisioning using it in an art journal or on a piece of canvas….so many opportunities with this… thanks for the opportunity to win this…
Katie says:
This is so awesome Kristy! I just picked up some laser cut wooden snowflake ornaments from Michael’s and was trying to figure out whether to use them as ornaments or on a card and regardless of how I use them this would be the perfect way to paint/color them. Now I know what’s going on my Christmas list 🙂
nitasha says:
Love the airbrush look! I would love to try this technique on the Pink Paislee mistables paper and embellishments that I picked up recently! Thanks so much for the tutorial!
Annie Lung says:
hmmm…I’ve been wanting to invest in one of these since I knew what amazing things it can do.
So I’m thinking Christmas right now…With a airbrush set I would want to scrap up a wooden frame…airbrush the edges with a vintage look, paste a nice colored paper that would match, air brush little embellishments such as snowflakes, Christmas tree, reindeer’s, snowman to add to the piece. I would also like to add “Penguin love Tia” in the corner to add a little focal point. Essentially I would use the air brush technique to add a little vintage feel to the overall look of the frame.
Penni says:
Wow to win this would be amazing. I could Air Brush Flowers, buttons, backgrounds…….
Thanks so much for the chance to win.
Hugs
Penni
X
Tricia says:
That is cool. I have never seen one so thx for the tut! I would love to try this on paper or fabric flowers that are handmade. Ithink that you could get some beautiful variations in color.
Kim H says:
Thank you for the quick tutorial, and sample. Love how it colored. I would use it on Christmas flowers, and cards. The shading would be beautiful on larger flowers. Thanks forthe chance to win.
Wendi R says:
oh my gosh!!! what a cool tool and loved your tut… I think that would be a great product to use on canvas to make home decor projects for around the house, depending if it’s for my kids rooms or in the family living room!!! that would have SOOOO many possibilities
Sarah C says:
I know that giddy feeling after I found mine for 40% off at Micheals. So thrilled that they now carry Copics. Haven’t used it yet, but can’t wait to play. Love the card.
grace says:
omg! i’ve heard of this but i’ve never seen it before =)
hmmm this is hard… what would i colour?
i would colour plain cardstock and make my own patterned papers =)
YAH!
scrapalajen says:
I’ve seen it but never dare to use it! You have upped my longing to get one for me now. Thanks for the tutorial.
scrapalajen says:
I’ve seen it but never dare to use it! You have upped my longing to get one for me now. Thanks for the tutorial. Would love to color chipboards, glass and wood veneers.
Anita Marie says:
wow that is a awesome idea i would use it on my scrapbook pages,it would look good sprayed over a mask or used on a stencil ..hugs Anita..xx
JLJ Designs says:
I think I would airbrush chippies with it. Thanks for the chance.
Jen
lizzie says:
okay that is so neat! i would totally use it to make scenes for my cards with! how cool would that be??
Ange says:
I think I would airbrush some masked butterflies on the background of a layout in rainbow colors. Looks totally fun!!
Denise says:
I love my copic air brush. Thanks for showing me a new trick. I can’t wait to try it.
Crafty Hugs,
Denise
Cassie says:
Perfect!!! I love your nail polish color too!! =)
Kristy says:
😀 Its a crazy color… matches my comforter AND my sons fav blankie (he takes it every where).
Barb O. says:
Thank-you for a picture tutorial, I have a slower connection so most videos are out for me! I would use it on canvas, ribbon and doilies for my cardmaking. Thanks for the chance to win!
karla says:
Wow to win this would be amazing. I could Air Brush Flowers, buttons, my paper
stamps etc
Lucianna says:
I have been debating about this, I would definitely be airbrushing me some primas or ribbon to match what I need. The possibilities are endless with what to spray, I may have to be stopped 🙂
Jamie M says:
What would I airbrush?? Hmmm, well everything 🙂 I would like to try it making backgrounds by putting a shape down to block some space to keep white. I would also like to try it on white prima flowers. I would try it on all kinds of things to experiment. I have been thinking of getting one, so I would love to win it! Thanks for the chance.
1LuvnMama says:
I don’t have an airbrush but I’ve heard you can do almost anything with it. Let’s see, maybe using it on fabric or felt to make funky patterns. Or maybe using it on ribbon or lace. 🙂
Carlyann says:
wow! ive not actually seen these before, but looking at your pics i would have to do the same as you why??? because where you’ve sprayed the buttons the background it creates underneath on the scrap paper is so cool!!!! hehe
hugs carlyann xxx
Trina says:
Grr… My router kicked me off as I was submitting my comment… I’d probably only make backgrounds as I love how the ones I’ve seen look…
Pat R says:
Cool! I didn’t know you could use the regular markers to airbrush. You’re awesome for sharing this! Thank you!!!
sunflower sue says:
What a cool new toy/gadget/tool! Besides scrapbooking/card-making, I’m into polymer and air dry clays. I’d love to use the airbrush to color some of my creations – I make flowers, teapot houses, ornaments, and recently little buttons/charms to decorate my cards and gift tags.
Amber says:
What wouldn’t I airbrush is a better question. But What is the first thing I would airbrush? Embellishments for cards. wood buttons like you did, masked card stock for backgrounds, flowers like prima or those I made myself with my Tim Holtz tattered floral die.
Pixie Camembert says:
OOOOOH that looks like fun! Would love to win one. Thank you for the chance!
Corinne says:
Such a cool tut- thanks!!! I would color chipboards! I’m cleaning out my craftroom and finding a bunch of them and have been putting them in my donations pile. Now I’ll be digging them up cuz I know I’ll love the look of the spray on them!
Cbarmayne says:
Would use the airbrush on lace. The lace I bought are mostly white or ivory color, I can then turn all my lace into the perfect copic color to match my image or card stock!
Sharman says:
Wow…I have see other use this but thought it was way above my talent but you made it look doable……I think I would take advantage of coloring all of my embellishments to match what I am doing and not worry about buying the right color. I could buy everything in white and be done with it knowing that I would always have the perfect color match. Thank you so much for this tutorial… If I do not win I might have to ask Santa for it….
Sammibug says:
OMG I would love to have this! Looks awesome! I’d br airbrushing everything in sight! Guess I’d start with some flowers, though, and work my way on from there!
Donna says:
SUPERB, what an item, I would use one for EVERYTHING, sunrises, sunsets, tie die, shoot, think i could color my dog? 🙂 Only kidding!! So many things to experiment with!!
Would love to be owned by one of these babies.
Thanks much for the chance!!!
Thanks for sharing
Donna
Linda w says:
The first thing I would try to do is color an image background by keeping a nestie in place to create a white frame around the background. I have always liked that effect.
stamping on…
Arabella says:
This looks really cool, but I have to admit I am still umming and ahhing over getting one, mainly because I would be worried it would chew through your ink. If I do get one, then I would use it to airbrush lace and use the lace on cards and also the lace patterned background. I would also like to use it with masking on a stamp to create a halo effect around the image. I think it would be great for a wall art canvas too!
Arabella
Amy O says:
Hmmm, I’m new to this, but I do love the masking. Maybe just for sky, grass, and water backgrounds to start… then I’d get more adventurous after that.
Sheila says:
I never took the time to see how the Copic AB system actually works. This is such great information to have and to see how easy it really is! I like to alter wooden picture frames. I could see me using the AB to alter my frames in a different way. I’m going to look into that! Thanks for the chance to win one. Happy birthday Kristy!
Sheila
Karyn S says:
this looks like fun – I would airbrush around the edges of my paper, like some people do sponging, I think the effect is great!
Mimi says:
wow! looks like fun…all the possibilities! never seen it used to color items other than paper before! great tutorial… TFS! 😉
Sandy G says:
Wow everything would be coloured. But I can see it being usefull the most to colour my paper flowers
Cathy P in AZ says:
I have had some fun playing with Copic airbrushing at my LSS – I LOVE creating speckled backgrounds and coloring white paper flowers and pearls. Hope I win so I can try it out at home! 🙂
Michelle says:
I would airbrush my shoes! They would be one of a kind!
Ardilla says:
WOW… great tutorial…
I don´t have any copic marker but I enjoy looking all the tutorial for the day I’ll have them (LOL)
lisa says:
I would cut out vinyl stencils with my cricut, then airbrush my cricut! Fun! I “neeeeed” this! Please help me!
LorraineN says:
I always think of backgrounds when I see the airbrushing tool, but am thrilled to see you coloring wood buttons! EEK…I would like to airbrush, everything, LOL!
jenn zeeb says:
What would I air brush, well, EVERYTHING!! Kids watch out. hehe!! I would love to win this, it would be SO much fun.
Happy Birthday
Jenn Zeeb
Deanna says:
Ohhh nice! I could definitely use one of these to color embellishments, flowers, ribbon, backgrounds, and tons of other stuff!
Kyles says:
Wow. What am amazing product. I would try using it in a portrait. I would also love to creat some amazing backgrounds. The skies the limit. 😀
Leah Martin says:
*picks up jaw* Giving one away?!? Amazing! I’m afraid I would go airbrush crazy with one of these… for better or for worse… scrapbook pages, picture frames, shadow boxes, wall decor, flowers…etc…etc… etc… Thanks for another AMAZING giveaway! :]
Jess Marin says:
Wow This looks like an uber cool toy. It would be great for canvases (which is what I would use it for) I love abstract painting and the airbrush system would be great with that technique.
thanks!
Jess M
Ps, Great nail polish color.