

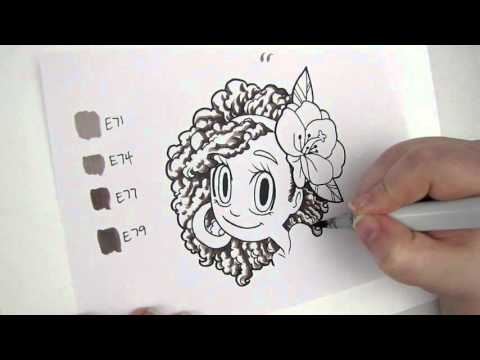
Hi ya everyone this is Melissa from Melissa Made!! I’m so super stoked to be sharing with you during Kristy’s Birthday Bash Month! The line-up is unbelievable and I’ve already learned SO much from the tutorials previously posted! I’m going to share with you a quick tutorial on how to get those Copics to blend together smoothly. I always get comments and questions on how I get the transition between my dark areas and light areas of an object – so today I’m going to share with you a very simple and easy technique to achieve just that!
Happy Birthday Kristy and thank you so much for letting me share today. I have one more little treat for you! Those that leave a comment on this post will have a chance to win a $10 gift certificate from Some Odd Girl!

You have thru October 29th to comment and get your entry in and winners will be announced on October 31st!


lizzie says:
oh my golly how awesome!
happy birthday again kristy!!!!!
Ange says:
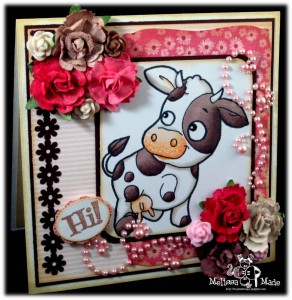
Great blending! And your mooey project is gorgeous!!
Denise says:
Thank you so much for tut!! U never can get enough of them when it comes to copics!!
Crafty Hugs,
Denise
Angie Ashuk says:
Great card. Thanks for the tut.
Anne B. says:
Very pretty card and beautiful coloring.
Linda Citronlime says:
Hrm…am I the only one that gets the message “this is private”?! 🙁
Kristy says:
Workin on that Linda 🙂 Boo to Youtube!
Kristy says:
All fixed! Come take a peek!
Jenny S. says:
Shucks- I couldn’t view it… Hoping I can see it soon! It says it’s private.
Kristy says:
Come and try now Jenny! 🙂 All fixed!
Angie Ha says:
Thanks for the tips. I’m still perfecting my blending!
Maria Therese says:
Gorgeous card ♥
But I got the message that the video was private..
Kristy says:
All better now Maria! 🙂
Faye says:
Brilliant tutorial and I love the card too. xx
SannaS says:
FABULOUS card!! love it!!! =)
Barb O. says:
Great colors but I love the pearls and flowers too, thanks for the chance to win!
Annie says:
Cute Card, I absolutely adore the critters. Thanks for the great tutorial 😀
auntie em (emily) says:
That was a great tutorial and a sweet card! I am taking my second Copic class tomorrow and have sooooo much to learn!
Thanks for sharing! 🙂
Tina Mayo says:
such a cute cow..wow thats great!! thanks for letting us watch..I love watching videos like that.
Tricia says:
great tut! I need to practice more!
karla says:
Very pretty card and beautiful coloring.
Lucianna says:
Loved your tutorial, really great tip and such wonderful coloring 🙂
Kim H says:
beautiful coloring, and a cute card. Love the pearl bling swirls, and the flowers. Thank you.
Carly Jo says:
The more tuts I watch the more I see that its not a “pick up marker and do it” kind of thing. I am using other cheap markers to try to see if I can ever get good enough to shade like I want. Everone here knows that Copics are an investment! I love the cow, does it say anthing “witty” or funny on the inside? Either way its a great show of skill, and a great “awwww” maker!
Katie says:
Awesome tutorial! I love seeing how others color 🙂 Hope you’re having an awesome birthday celebration Kristy!
1LuvnMama says:
Wowza! What an awesome tutorial! 🙂 I luv to see how others color and this tut by Melissa was worth seeing! I must try this technique . . . usually use the light to dark then back down to light again. Great job and a Happy Birthday to you Kristy!
nitasha says:
Pure cuteness! I am a newbie to Copics and I am learning so much here!
Creative Grammie says:
Wow! Happy Birthday Kristy!
Melissa, thanks so much for sharing such a great tutorial on blending with copics, I loved it.
This is a great site and I’m now a follower. I found your site from Mama’s blog, “Luvn the Journey”; glad I found you both.
Maria Therese says:
Awesome video ♥♥
Karen says:
Thank you for sharing this technique….out of all the copic videos I have watched I haven’t come across this sort of tutorial…so thanks!
Leah Crowe says:
Absolutely fantastic tutorial/video Melissa.. this is definitely a video I’ll be watching again.. Your mooey is soooooo darling.. love the card!!
Carmen says:
I love these tutorials. Thanks Kristie.
Happy birthday.
Carmen
Brenda says:
Fabulous tut by Melissa!! Love the outcome as well. Hugs~Bren
petraso says:
WOW !!! I didn´t now this!! So great!!!! Impressed!!!
Trina says:
Thanks for putting this tut together! The Mooey card is beautiful and well-colored!
Pat R says:
I’m not sure what’s going on, but the tut keeps stopping when I get to 1:41 minutes. Is it me, or did anyone else run into this?
Pat R says:
Got it! Thanks for showing me this! I need all the tutorials I can get! Happy Birthday again Kristy and I love the way you celebrate your birthday!!!
KarenB says:
Wow, amazing tutorial, thank you 😀
Amber says:
Thank you so much it makes me want to rush off and play with my copics….alas work first play soon.
JLJ Designs says:
Thanks for the great tutorial! I’ve been really struggling with smooth blending in large areas and I really think this will help.
Jen
Anita Marie says:
wow awesome tutorial ,absolutelt love your card..hugz Anita..xx
Corinne says:
Melissa, fabulous coloring tut!! Great tips and techniques on blending! Loved it.
Cbarmayne says:
Great tutorial thanks Melissa! Super cute card too….
Sharman says:
Great tutorial. Great tip on laying down the colorless blender first. Never thought of that. I am practicing everyday so that I can get that coloring down without any streaks….. Thanks for the tips….
Sammibug says:
Awesome tutorial! Makes me want to play with my Copics, now! The project is gorgeous, too!
Donna says:
Wonderrful blending technique, I use just about the same way, was taught a bit different but slowly started doing it this way and it works for me, is a bit tougher in small areas, but i am adapting.
Thanks so much for your video, was very helpful!!
Thank you,
donna
Arabella says:
Great tutorial! Thanks for sharing Melissa! Your Mooey card is super cute!
Arabella
Trisha says:
Wow, thanks for the tutorial. You make it look so easy. I only have a small set of copics and not the lighter versions. Now I see why I cannot get them to blend well. Sure do need to get more. Thanks again.
Amy O says:
It’s so interesting how everyone works a little differently! Still trying to figure out what works for me. Your mooey is so cute!
Sheila says:
Melissa I learned so much…. I never new about flicking your marker. I am so new to this digital and regular stamps and coloring…. Just collecting copics now. I also learned to color in circles…. Can’t wait to try this technique. Thanks for taking the time to show us.
Sheila says:
Gorgeous card! Thanks so much for the tips. I’m going to try it later today.
Sheila
http://2pawprints.blogspot.com/
Anita M says:
Fabulous tutorial Melissa and your coloring is beautiful.
Karyn S says:
wowee, these videos are so helpful! thanks for sharing – btw you are a very fast colourer (hehe)!!
Nana Donna says:
Happy Birthday and wow Melissa sure stepped up to help us out with the blending
she truly has an awesome talent in coloring with the Copics
Mimi says:
thanks for a fab tutorial! always like to see how others color and blend! TFS! 😉
Ardilla says:
Thanks for this tutorial and thanks for the chance to get a prize 🙂
Leah Martin says:
Love the speckles on Mooey’s nose! Too cute!
Jess Marin says:
Oh yay! Ive been a fan of Melissa for quite some time now. Transitioning can be difficult but I agree, practice practice practice. I know I need some. Thanks for the tutorial!!!
Jess M