Good morning everyone!
I am so excited to be part of Kristy’s fabulous birthday blog party. Wish we could have one every month!
Today, I would like to share a little step by step with you on how to create a layered monochromatic card. They are fun to do but can have you scratching your head sometimes…especially when you try to decide if the paper you have chosen fits with your monochromatic scheme.
You know, I never beat myself up too much about it – I stick with the basic of my chosen colour but if I want to add something that has a little black or a little white on it…well, I just add it. As with everything in paper crafting, there are no hard and fast rules – as long as YOU like what you’re doing, you are good to go.
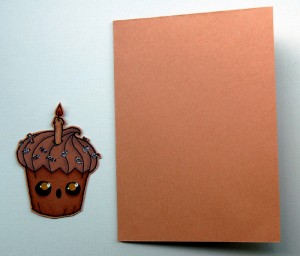
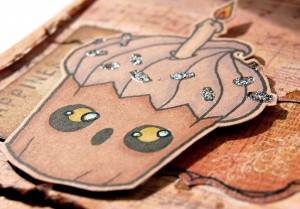
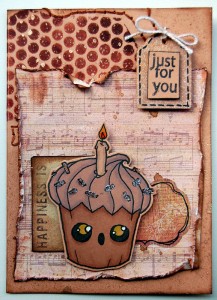
But I digress, for today’s post I have decided on a brown/beige colour combination and in celebration of Kristy’s birthday, I thought it would be great to make use of my first ever Some Odd Girl stamp, the Cupcake with Candle (retired). I printed him on the same card stock which I am using for the base:
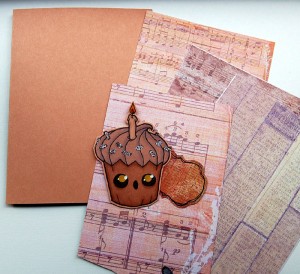
The next step was to find some matching papers and I always find it easiest to pull all papers which I think fit the bill an lay them across the cardbase:
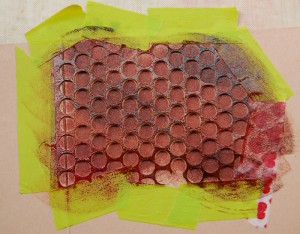
I also wanted to add some stencilling and misting to the base of the card and used a piece of punchinella as my stencil:
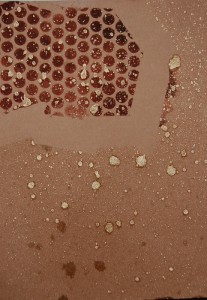
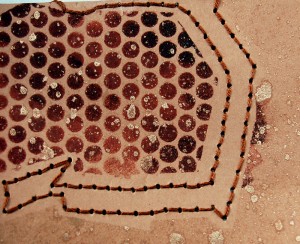
Afterwards, a generous helping of various mists was distributed over the front of the card, but I wasn’t thinking properly and should have taken the masking tape off beforehand…now I was faced with this dilemma:
I did not want an area on the card to remain blank, but it would have looked strange had I misted over the area again, so I got my embroidery floss out and just added some random stitching:
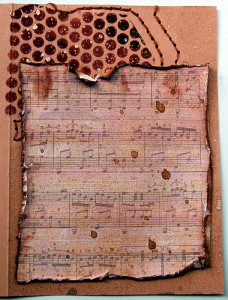
Now I was happy enough to continue and started tearing and inking my chosen paper for the background:
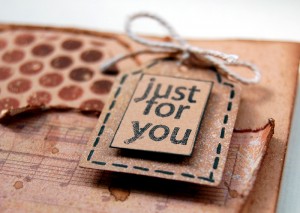
I then added the sentiment and the image to the card base:
And there you have it: a layered monochromatic card:
I hope you enjoyed this little step by step and don’t forget to stay tuned into this blog as the party keeps getting better and better.
If you want to see more of my work, you can visit me over HERE.
Products used:
Cardstock – Stampin’ Up
Papers – Donna Salazar Designs, My Minds Eye
Mists: Cosmic Shimmer, Tattered Angels
Pens: ProMarkers
Digital Stamp: Some Odd Girl
Senttiment Stamp: myStampBOX






Maria Therese says:
Beautiful card ♥
Donna says:
Adorable card Kimmy, so darn cute. I personally LOVE monochromatic cards, I like doing them and love how they look, and yours came out so great, and thanks for the Tutorial of how you did yours. Got to love these birthday celebrations, I am so enjoying Kristy’s and learning so much!!
Have a great day all.
Donna
auntie em says:
You are so clever! I love the stitching around the misted dots (which are awesome, BTW) and the cute little cupcake topping. Looks like it was a fun card to create. And there are NO accidents, just opportunities! 😀
Thanks for sharing all the great ideas! 🙂
petraso says:
Wounderful!
Linda Citronlime says:
Oh I like this…a lot!!!
Melissa says:
WOW – I love your monochromatic card and technique – this is so difficult to pull off but it looks FABULOUS!
Love it!
Hugs,
M
Pat R says:
I love the card! Thanks for letting me know I’m not being really bad when I use just a bunch of shades of purple or pink!
Kim S says:
Thank so much for your sweet comments ladies – I had a blast making the card and being part of this fabulous birthday party!!!!
Annie says:
cute card and cute technique 😀
Brenda says:
Great card. I love that stitching, but dang it, I would have a hard time covering so much of it!!
Mimi says:
thanks for a great tutorial! i have that cupcake ;D will have to give this technique a try! 😉
KarenB says:
Hi Kim, your tag is stunning – I’m a huge fan of monochromatic, and I love the way you built the layers 🙂
Anita Marie says:
wow kim love your colouring,super kool card..cheers anita
Sheila says:
Thanks so much for the lesson! Your card is gorgeous.
Sheila
Leah Martin says:
I like the card with the stitching, a lucky mis-step!
Jess Marin says:
The random stiching was a perfect way to save the card.