You may have noticed that my project pics look a little different lately. I had to take what felt like 1 million and 1 pics for Some Odd Girl’s catalog and I wanted everything on a white background so I wasn’t worried about placement and such so much. AND I wanted it to look as professional as possible while it was me doing it so I had to brush up on my photography skills. I don’t know really if I learned any new skills per se but I changed my back drop and added a couple new lamps. I don’t want to have to do a ton of photo editing after I’m done and while this isn’t perfect its as close as I can get without dropping some dough.
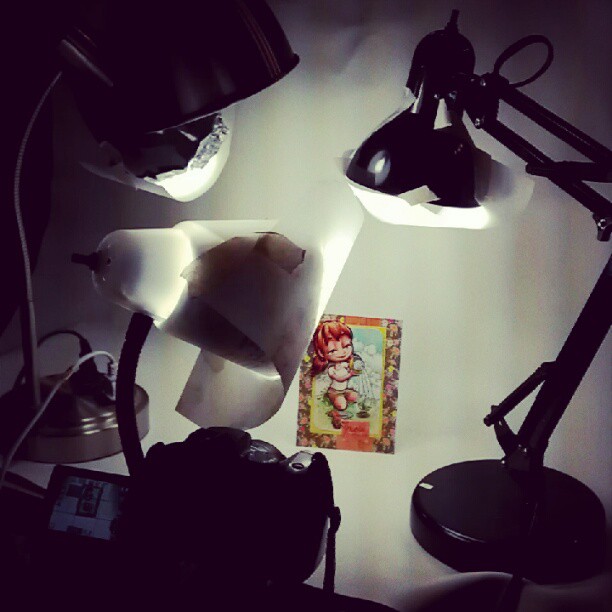
My back drop used to be regular fabric but I’ve changed it to a white vinyl. Not the kind you use in your silhouette with the sticky back but the kind you would upholster a chair with. If you roll it up it doesn’t wrinkle and if you do fold it and it does wrinkle I find you can lay it in a sunny window for a bit and the wrinkles kind of melt away. In other words, no ironing! I like that SO much! My actual set up is the same as before otherwise. I’ve added 2 more lamps than I had there, mostly to illuminate the background to keep out the harsh shadows running up the back drop. After adjusting for the specific project I don’t have a lot of touch up to do.
Basically all I do is take it into my photo editing program and use Curves to go from the before to the after 🙂 Easy Peasy. If you don’t have anything you can try using this bit of cool web fun, Pic Monkey. Its totally free. You can edit, resize, adjust colors and add a text watermark in minutes. I took my before and came out with this in just a couple minutes
So in the wonderful world of sharing and pinterest don’t let not having fancy software stop you from watermarking you images. Especially since the monkeys are so cute lol. I found the site by accident and just wanted to share and this seemed like a great post for it. I hope it was helpful 🙂













Leah Crowe says:
This looks really good!! When you adjusted the white for the background, did you use the background as your white source or something on the card itself? (Am I making any sense? loll) LOVE all the details in your coloring.. the raised mound in the dirt, the dirt on her gloves.. i could go on and on. (: (:
Kristy says:
I know what you mean 🙂 No, I usually just eyeball it.
The gloves are my fav too! I was happy the idea turned out so well. Can’t say that all the time lol
Eline Jansens says:
thx for the tip on this pic monkey website! I will definately try it out!
Now let’s do some shopping =D !
Rachel Parys says:
Wow, you are goooood. Photographing cards can be crazy frustrating! I never pick up the glitter and sparkles the way they look in person! Thanks for sharing!!
Kristy says:
agreed! Amy at A Thousand Sheets of Paper (http://www.athousandsheetsofpaper.blogspot.com/) uses a lamp straight on with the card sitting on a light box. It makes the bling and pearls shine nicely I think too.